Chain Link Fence Privacy Slats Installation Guide
Installing privacy slats in your chain link fence is a simple and effective way to enhance both the appearance and privacy of your outdoor space. Whether you're looking for a clean, streamlined look or a more natural, decorative style, there are slats to match every need. In this guide, we'll walk you through the installation process for a variety of popular slat types. You'll find instructions for Bottom Lock, Top Lock, Winged, Industrial, and LiteLink slats, as well as more specialized options like FinLink, Feather Lock, Option Lock, and Forever Green hedge slats. Each type has its own unique features and installation method, but they all share the goal of turning an open fence into a private and polished barrier. Let’s get started and find the right fit for your fence!
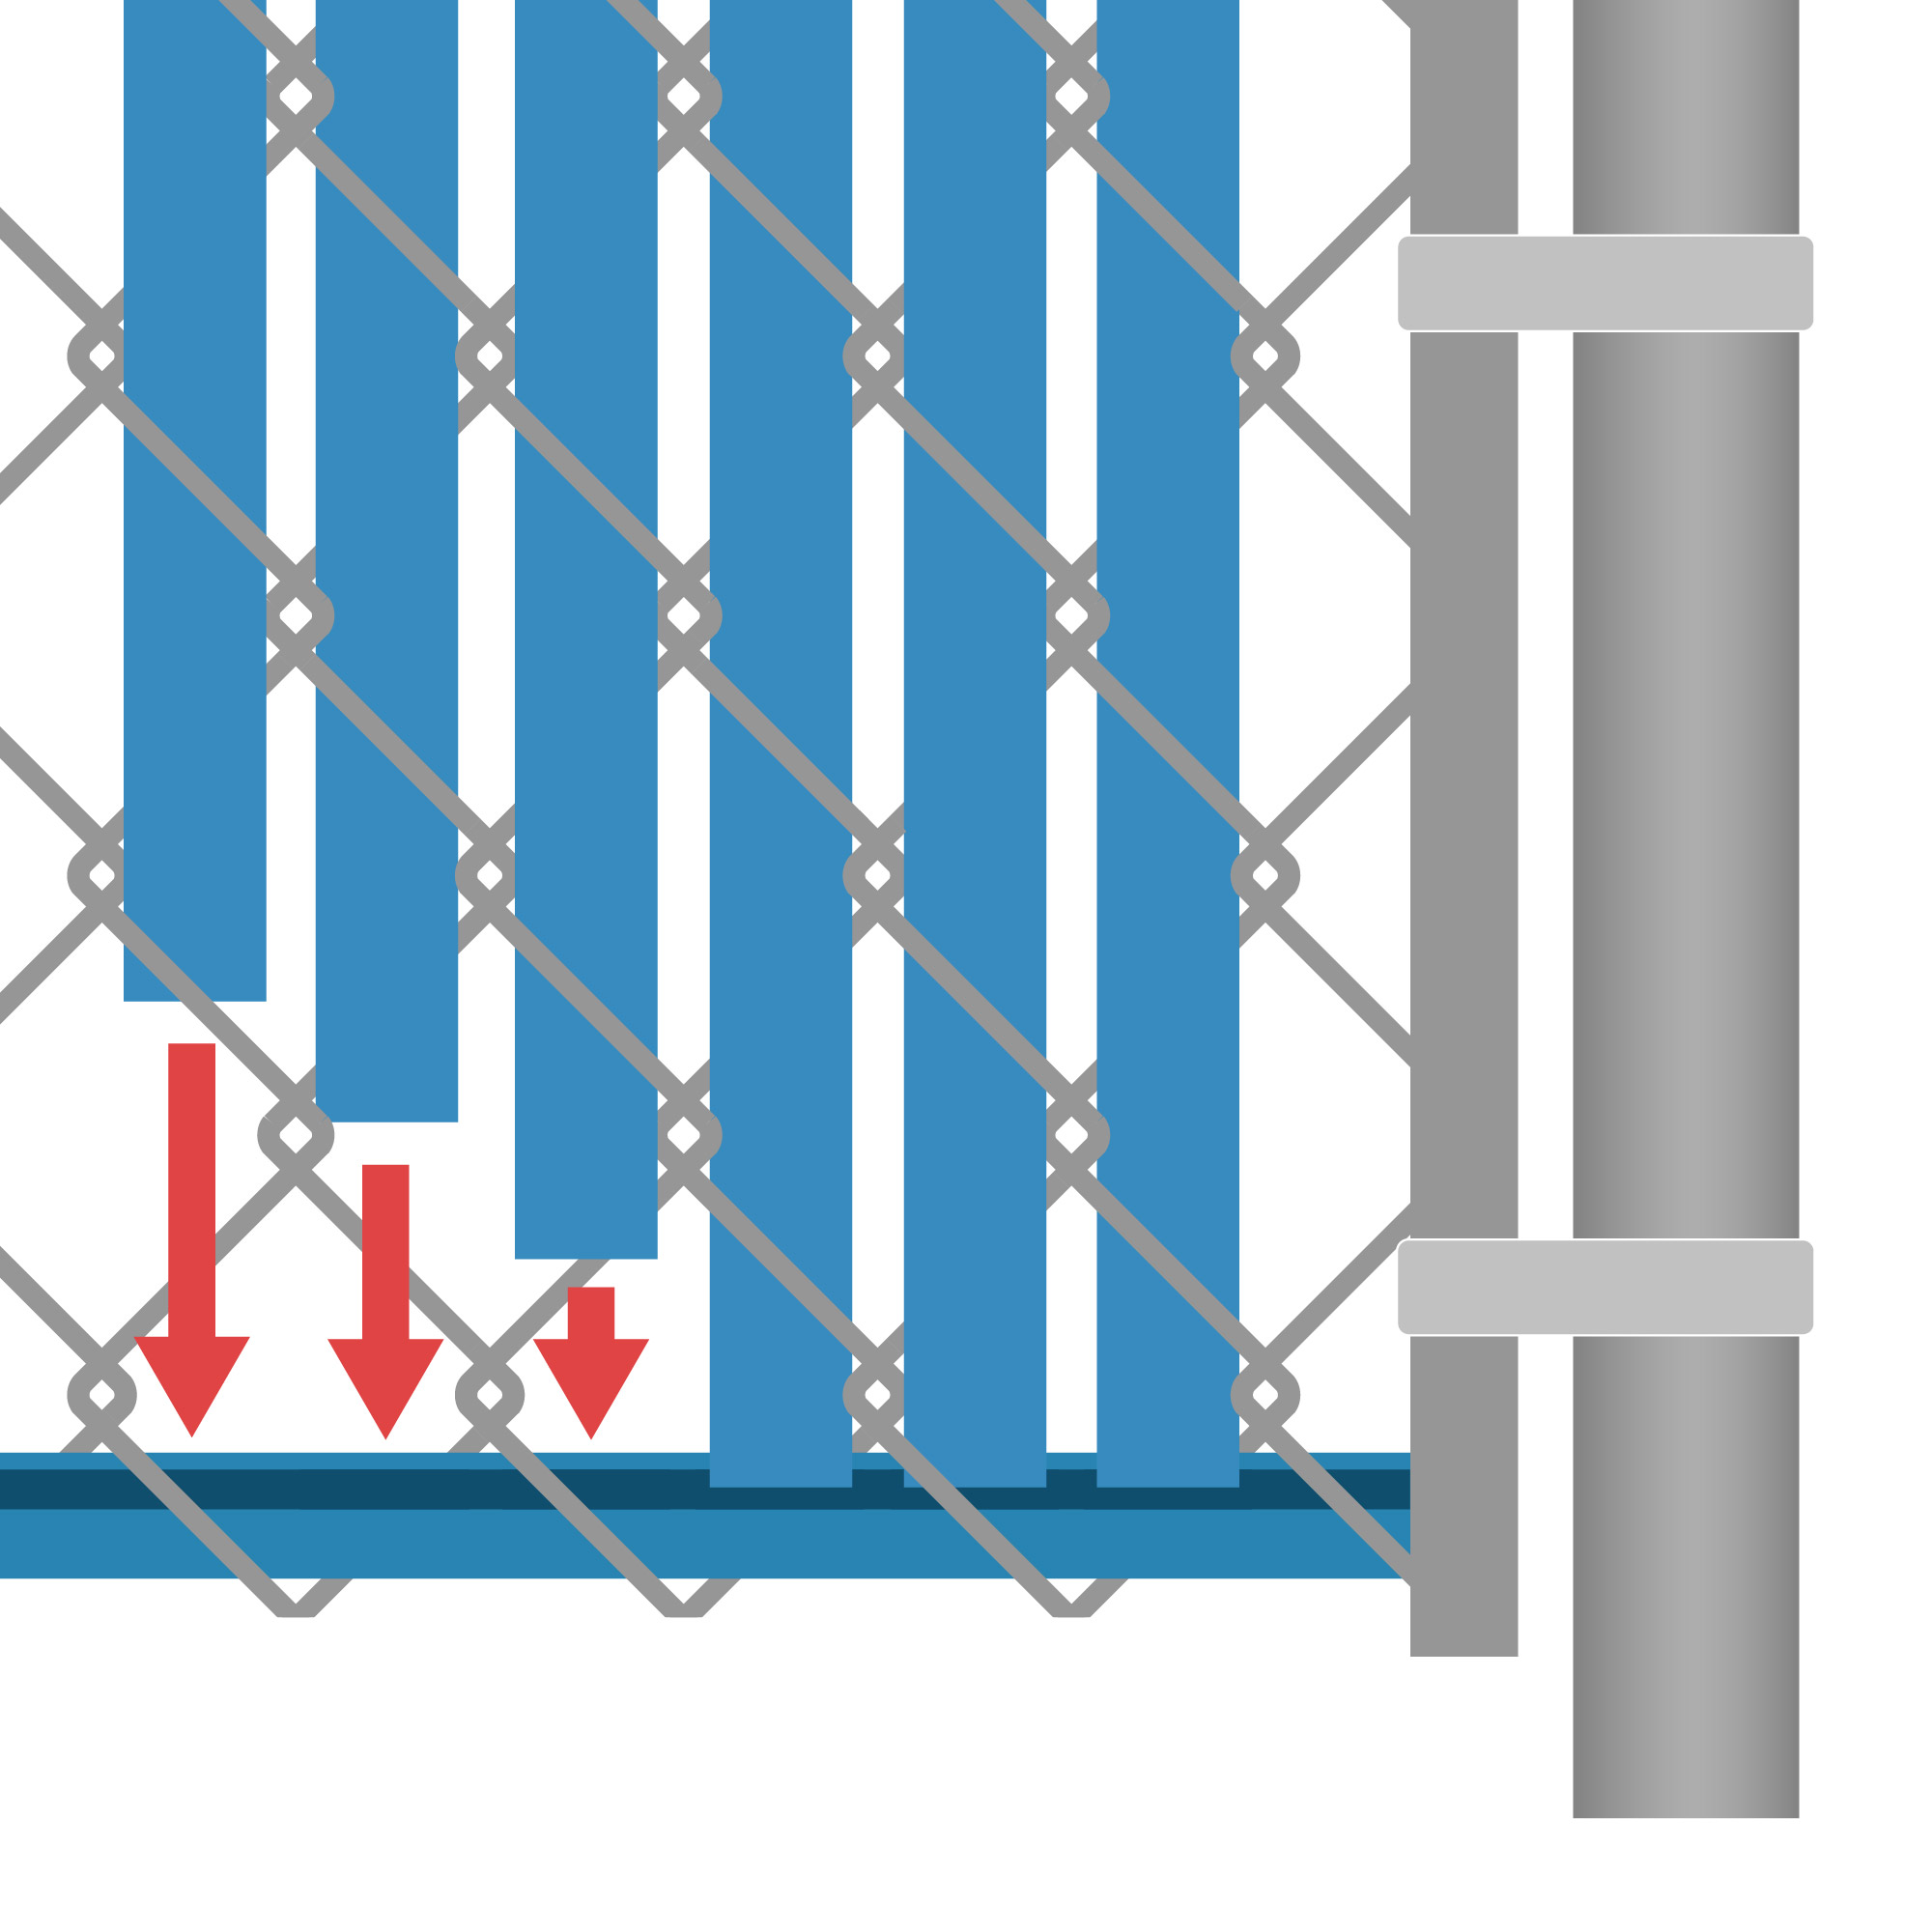
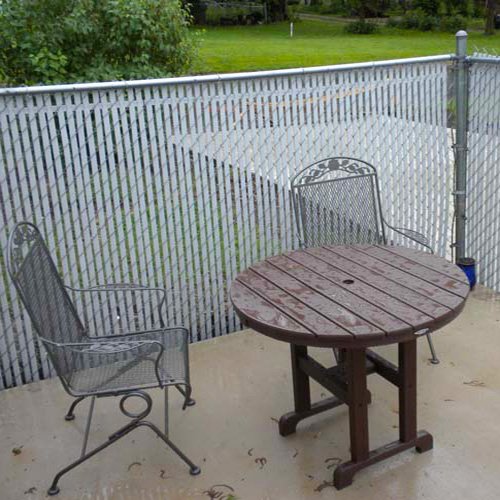
1. Bottom Lock Chain Link Fence Privacy Slats
Tools and Materials Needed:
- Bottom Lock privacy slats
- Bottom locking channel
- Tape measure
- Scissors or utility knife
- Protective gloves
Installation Steps:
Preparation:
- Measure the length of your fence to determine the number of slats and bottom locking channels required.
- Lay out the slats and channels along the fence line for easy access during installation.
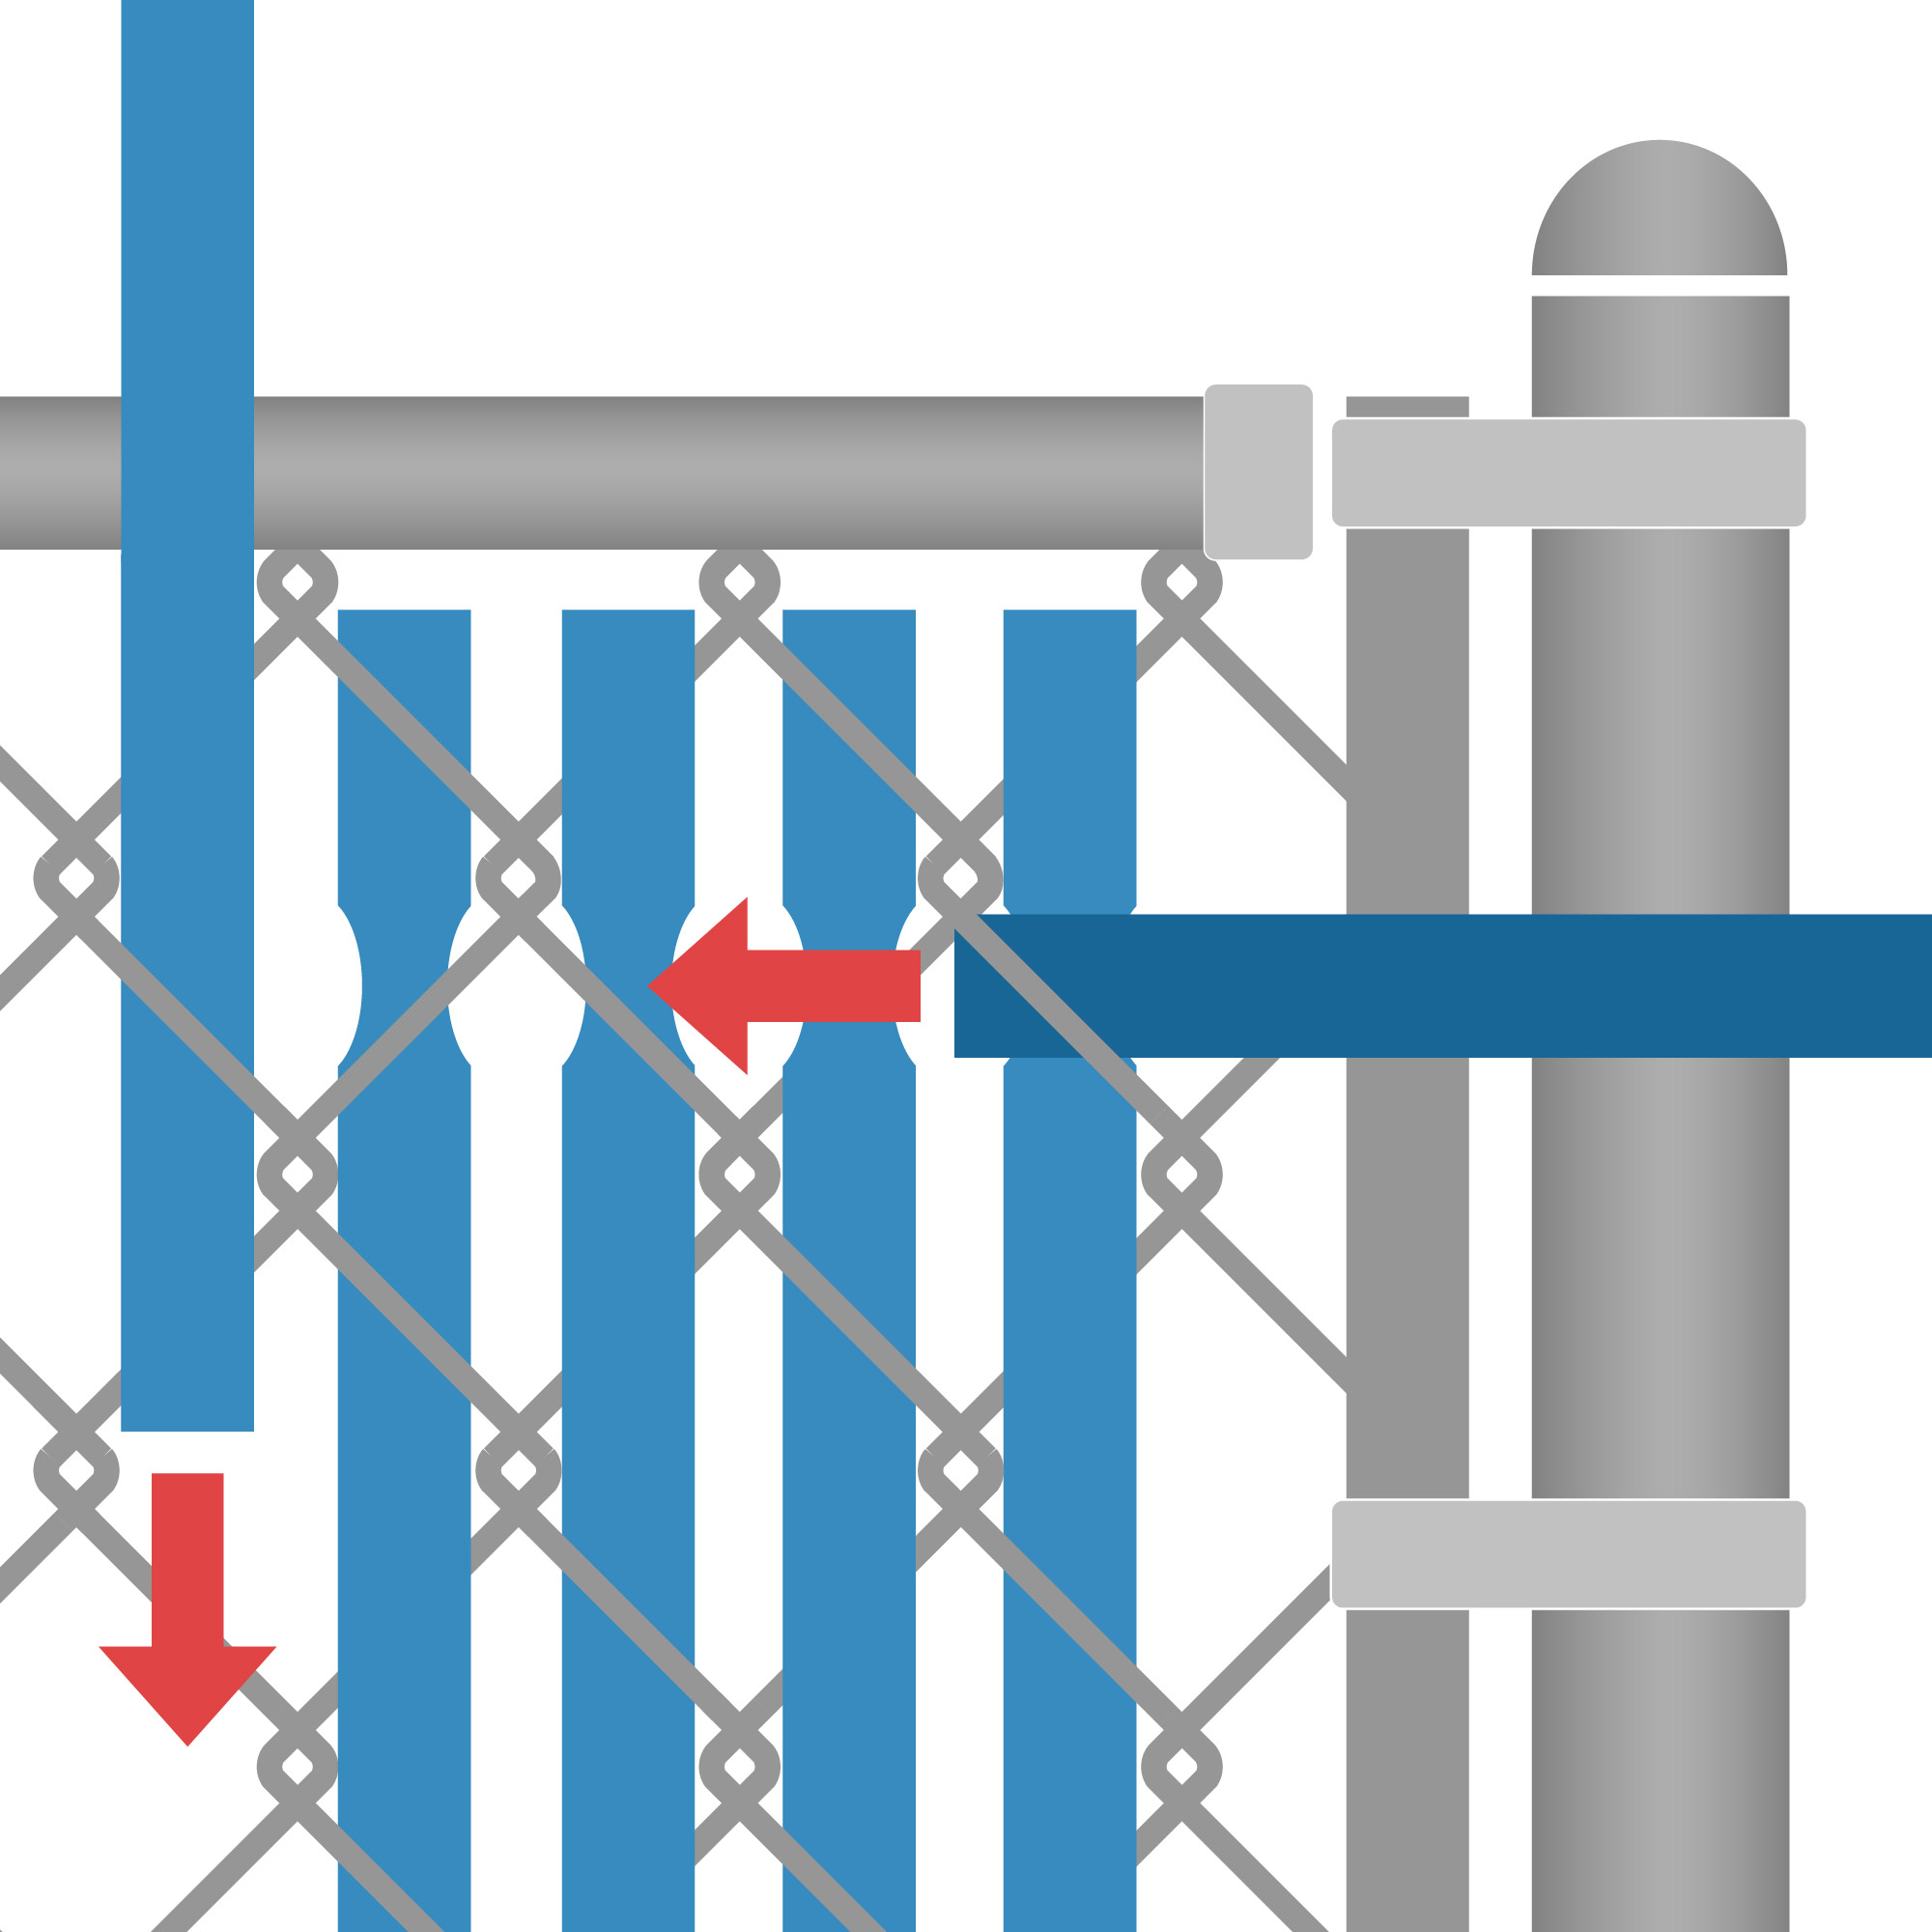
Install the Bottom Locking Channel:
- Place the bottom locking channel horizontally at the base of the chain link fence, ensuring it runs parallel to the ground.
- If the channel is longer than needed, trim it to the appropriate length using scissors or a utility knife.
- Secure the channel by threading it through the bottom loops of the chain link mesh.
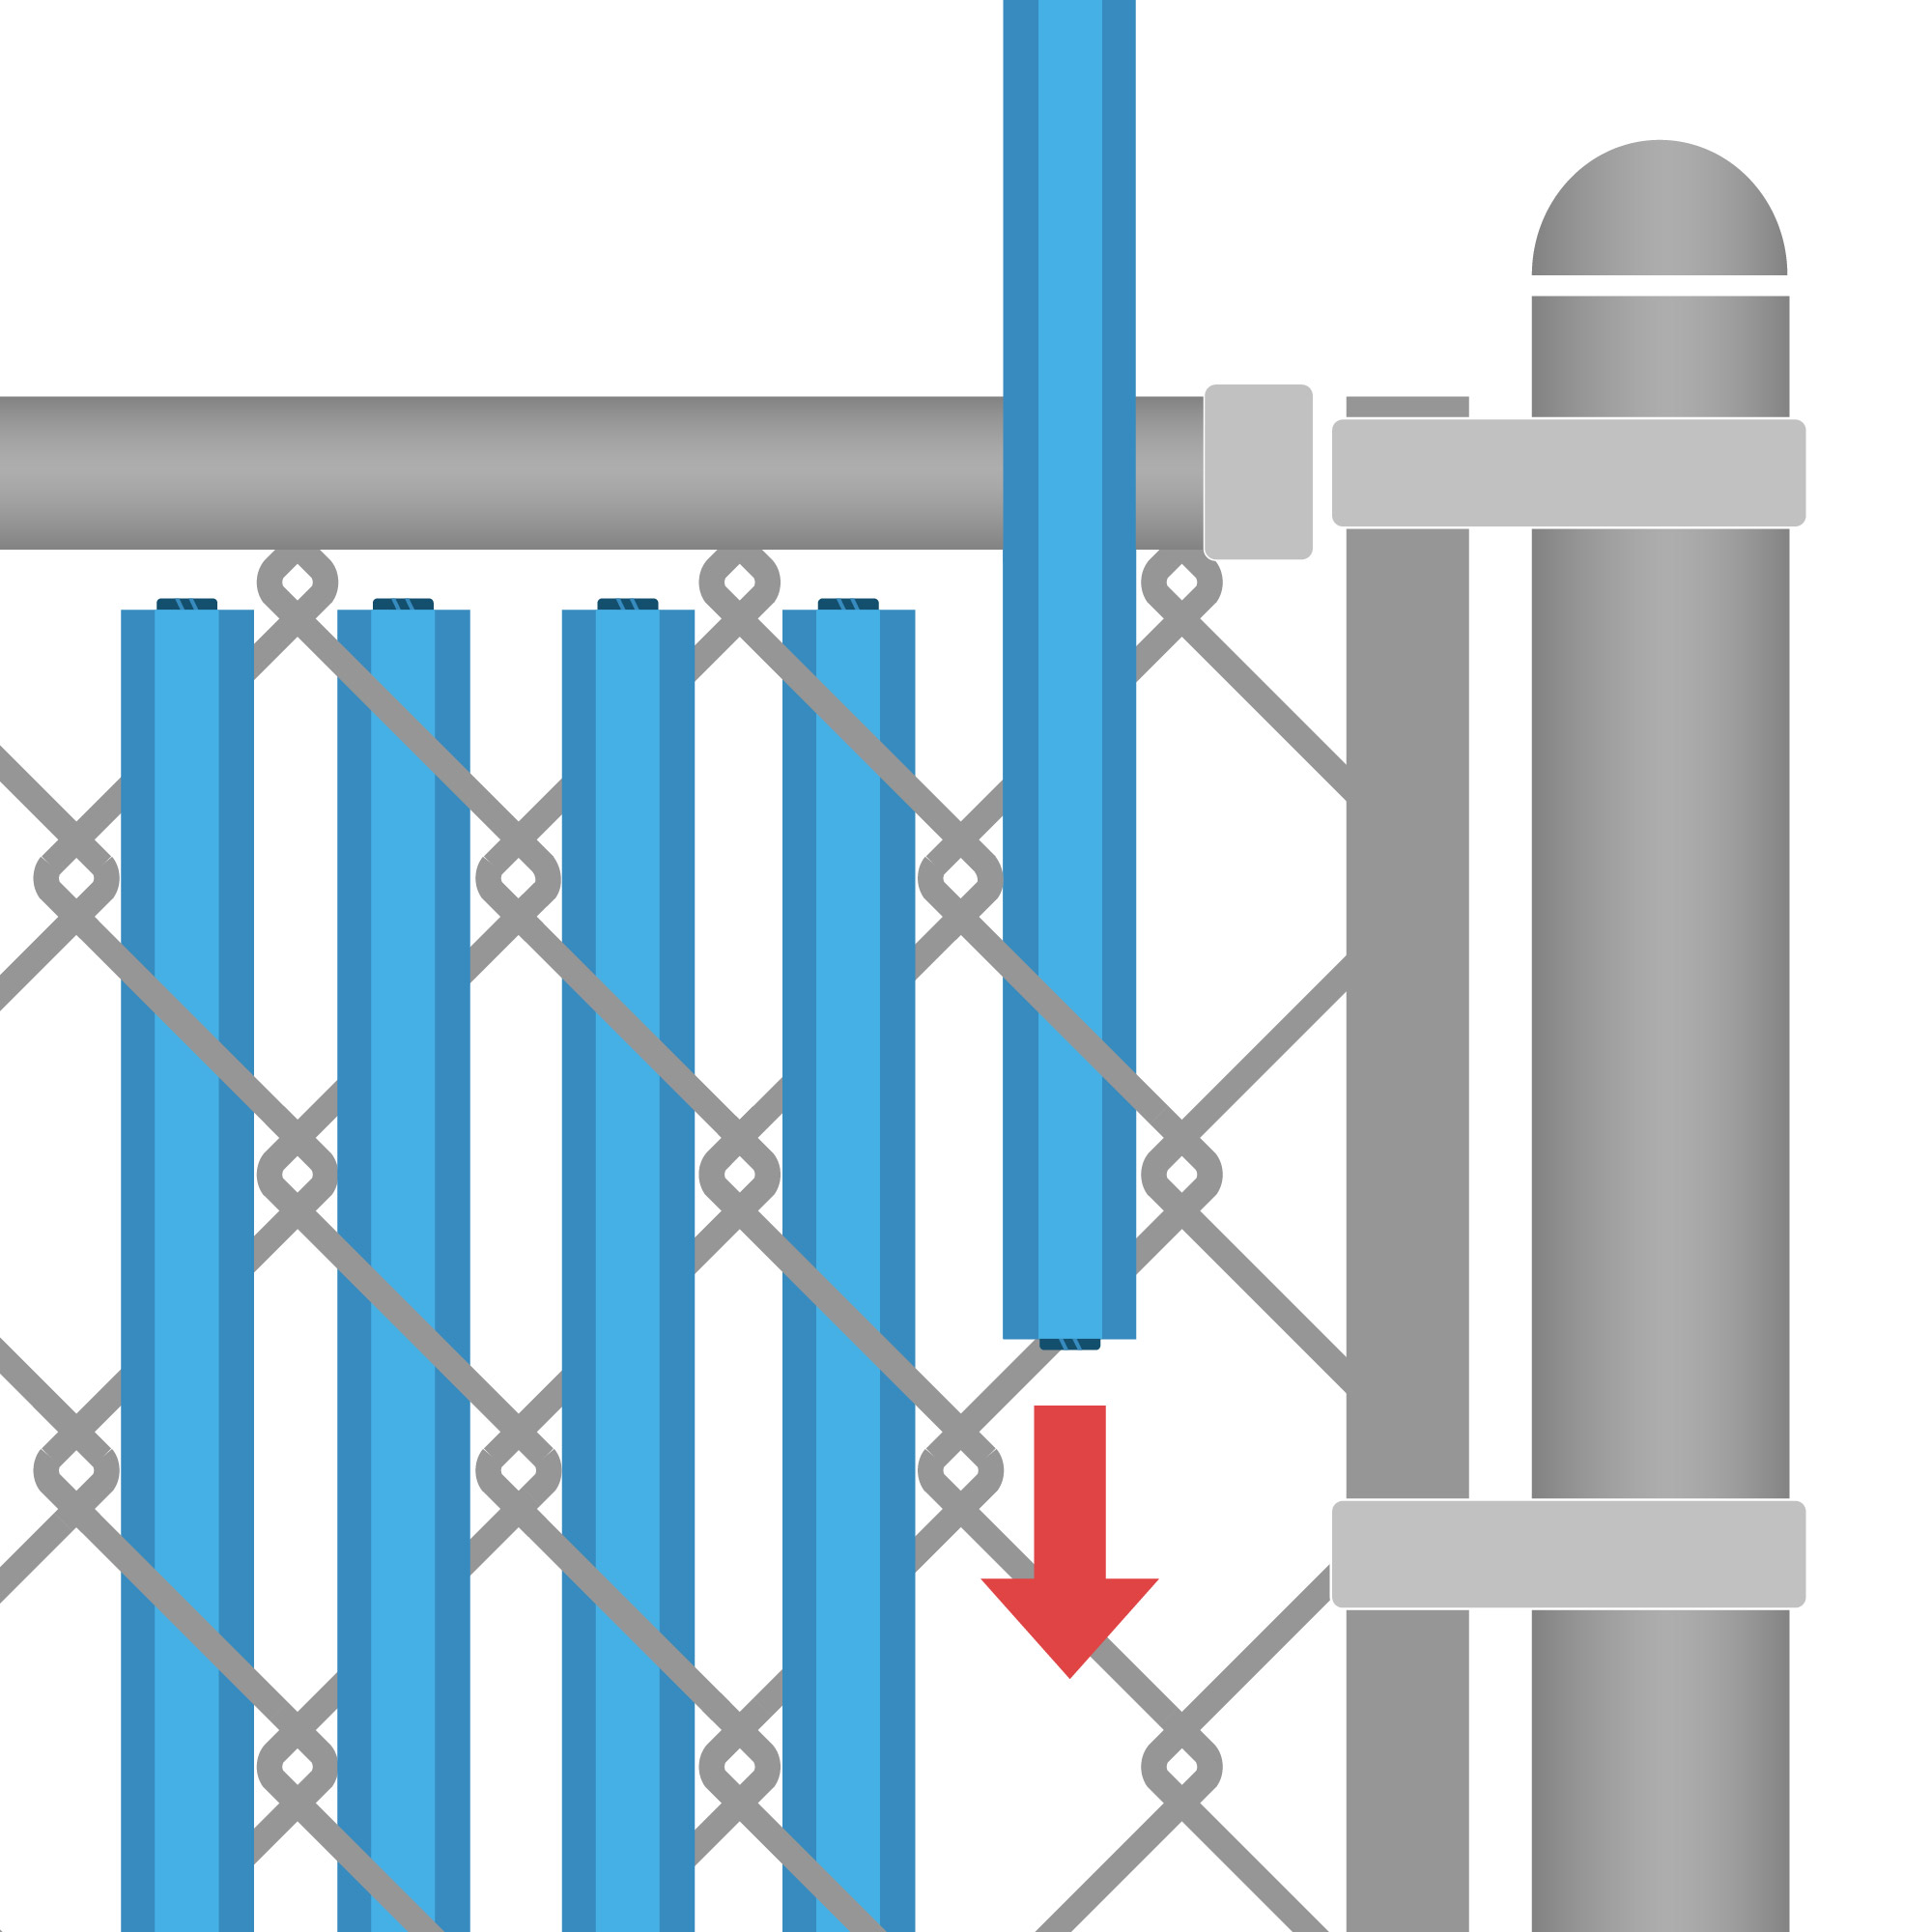
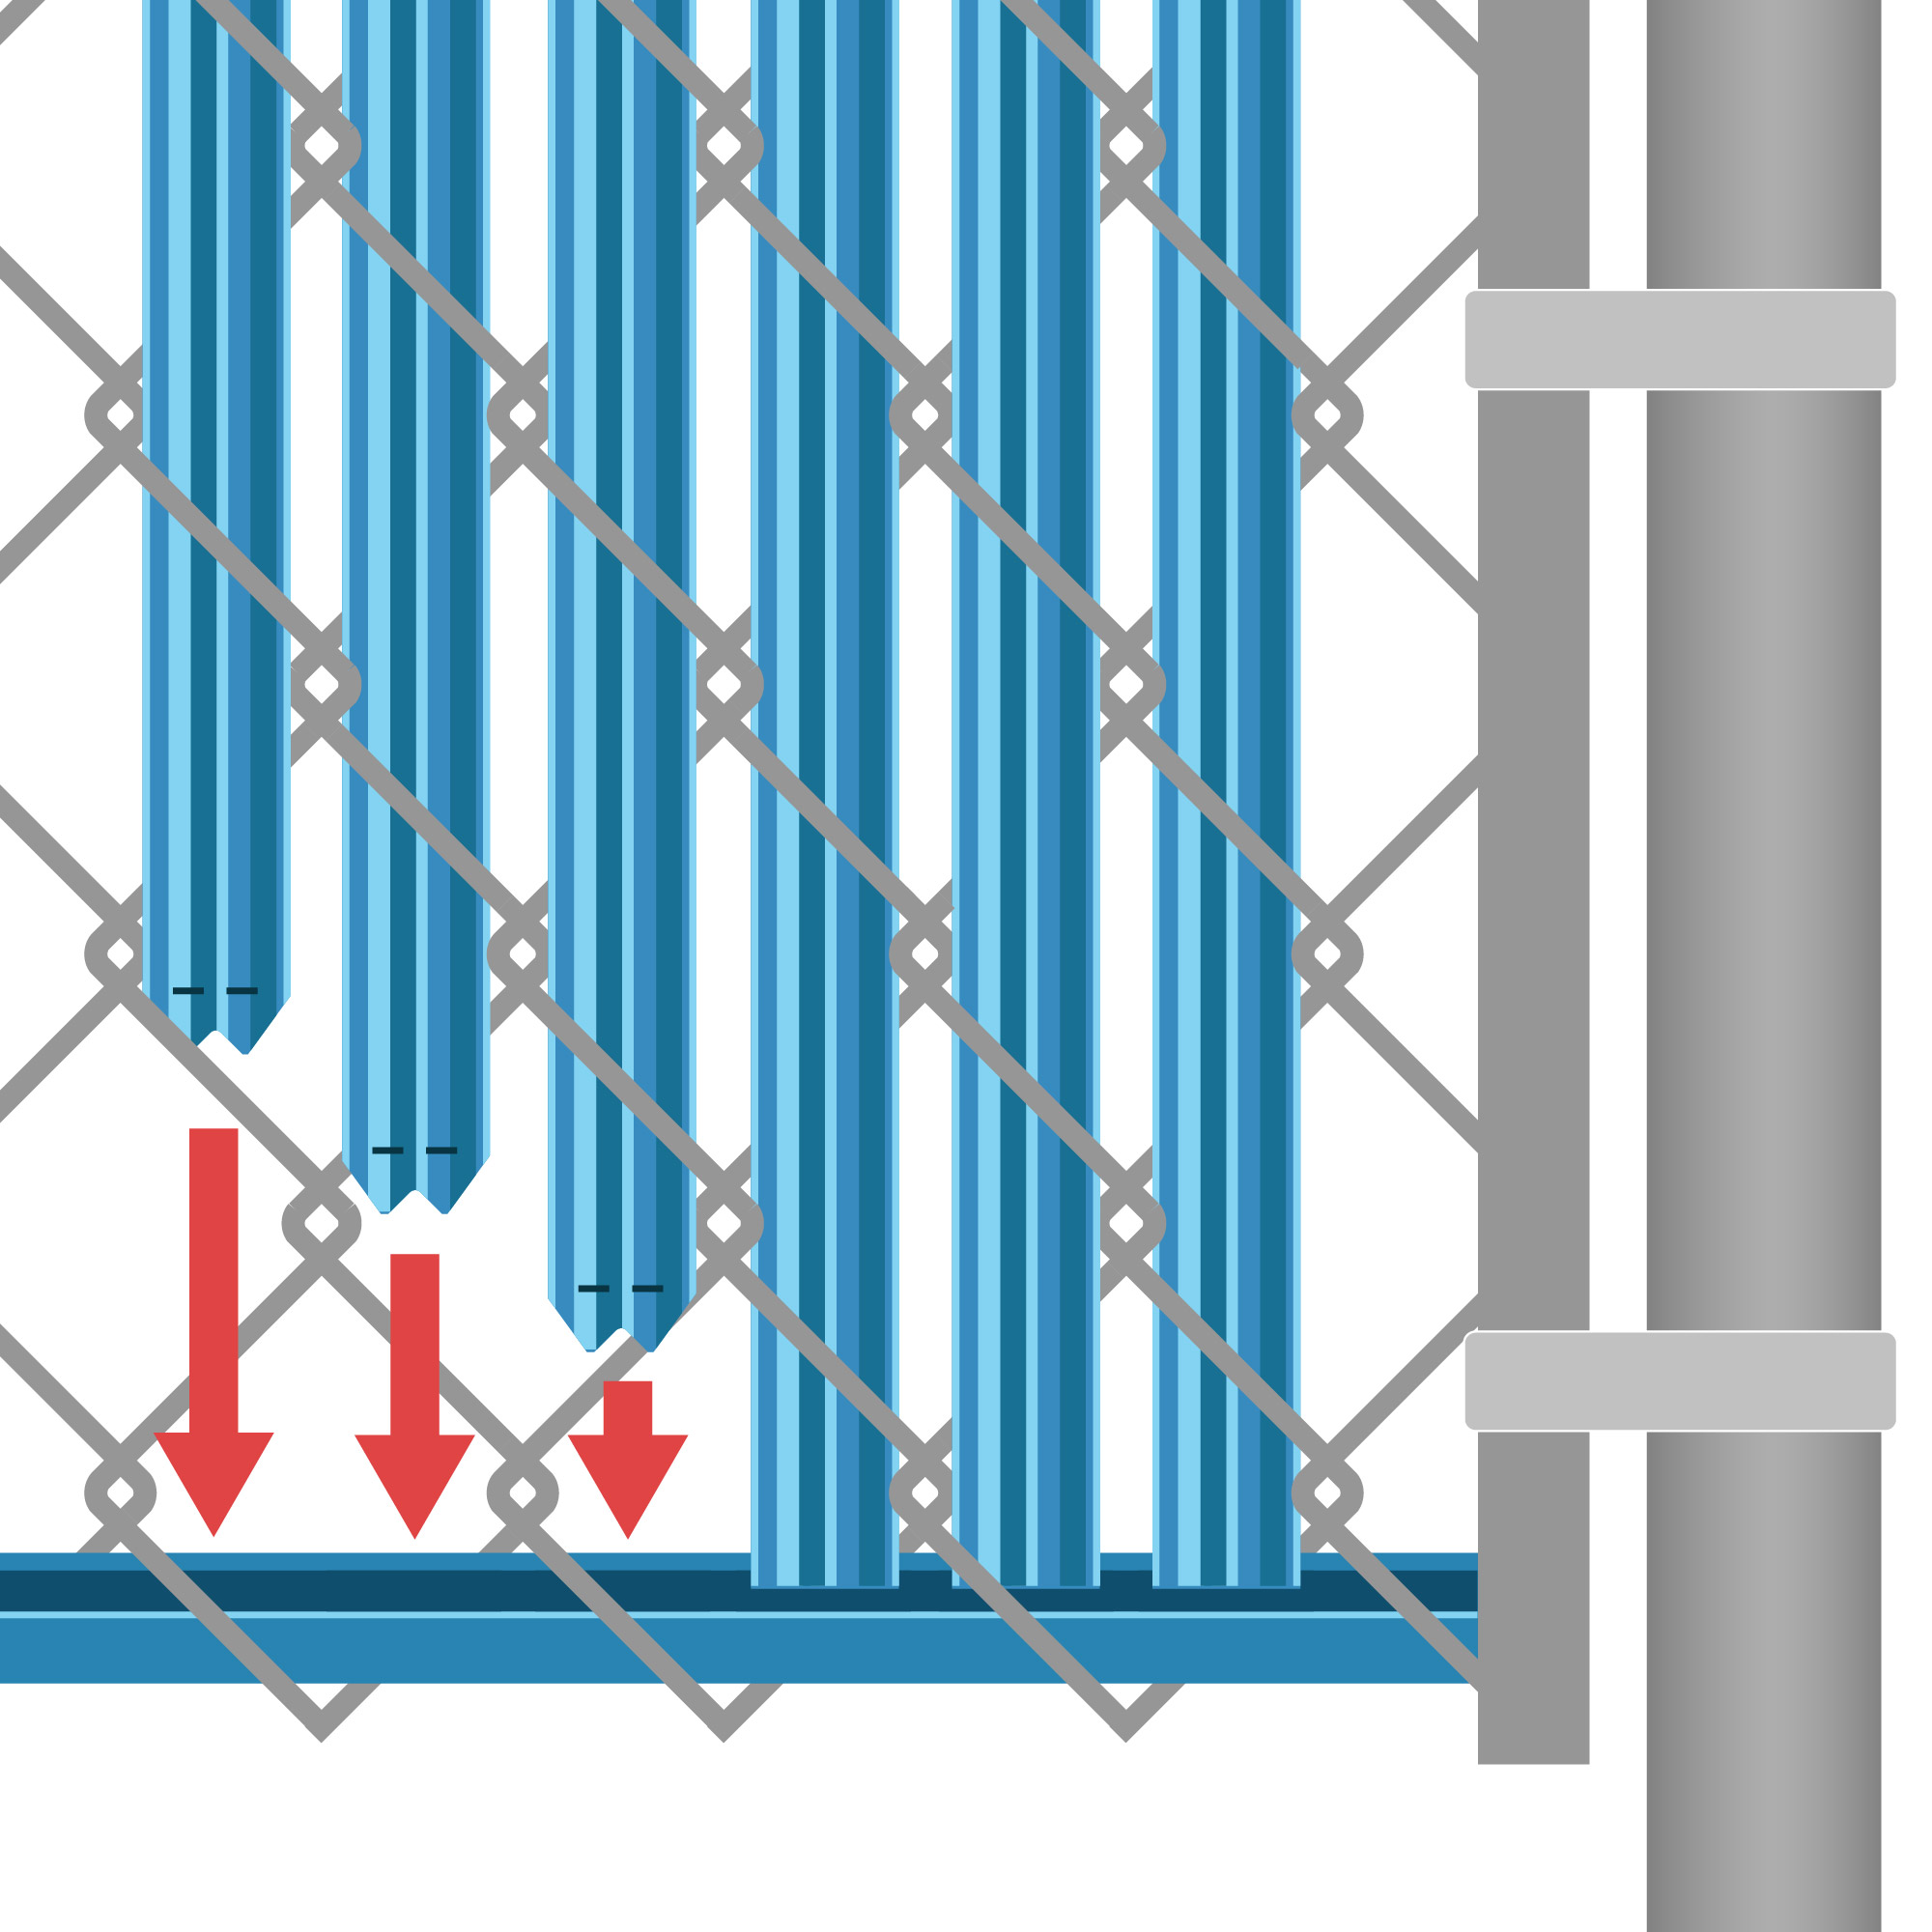
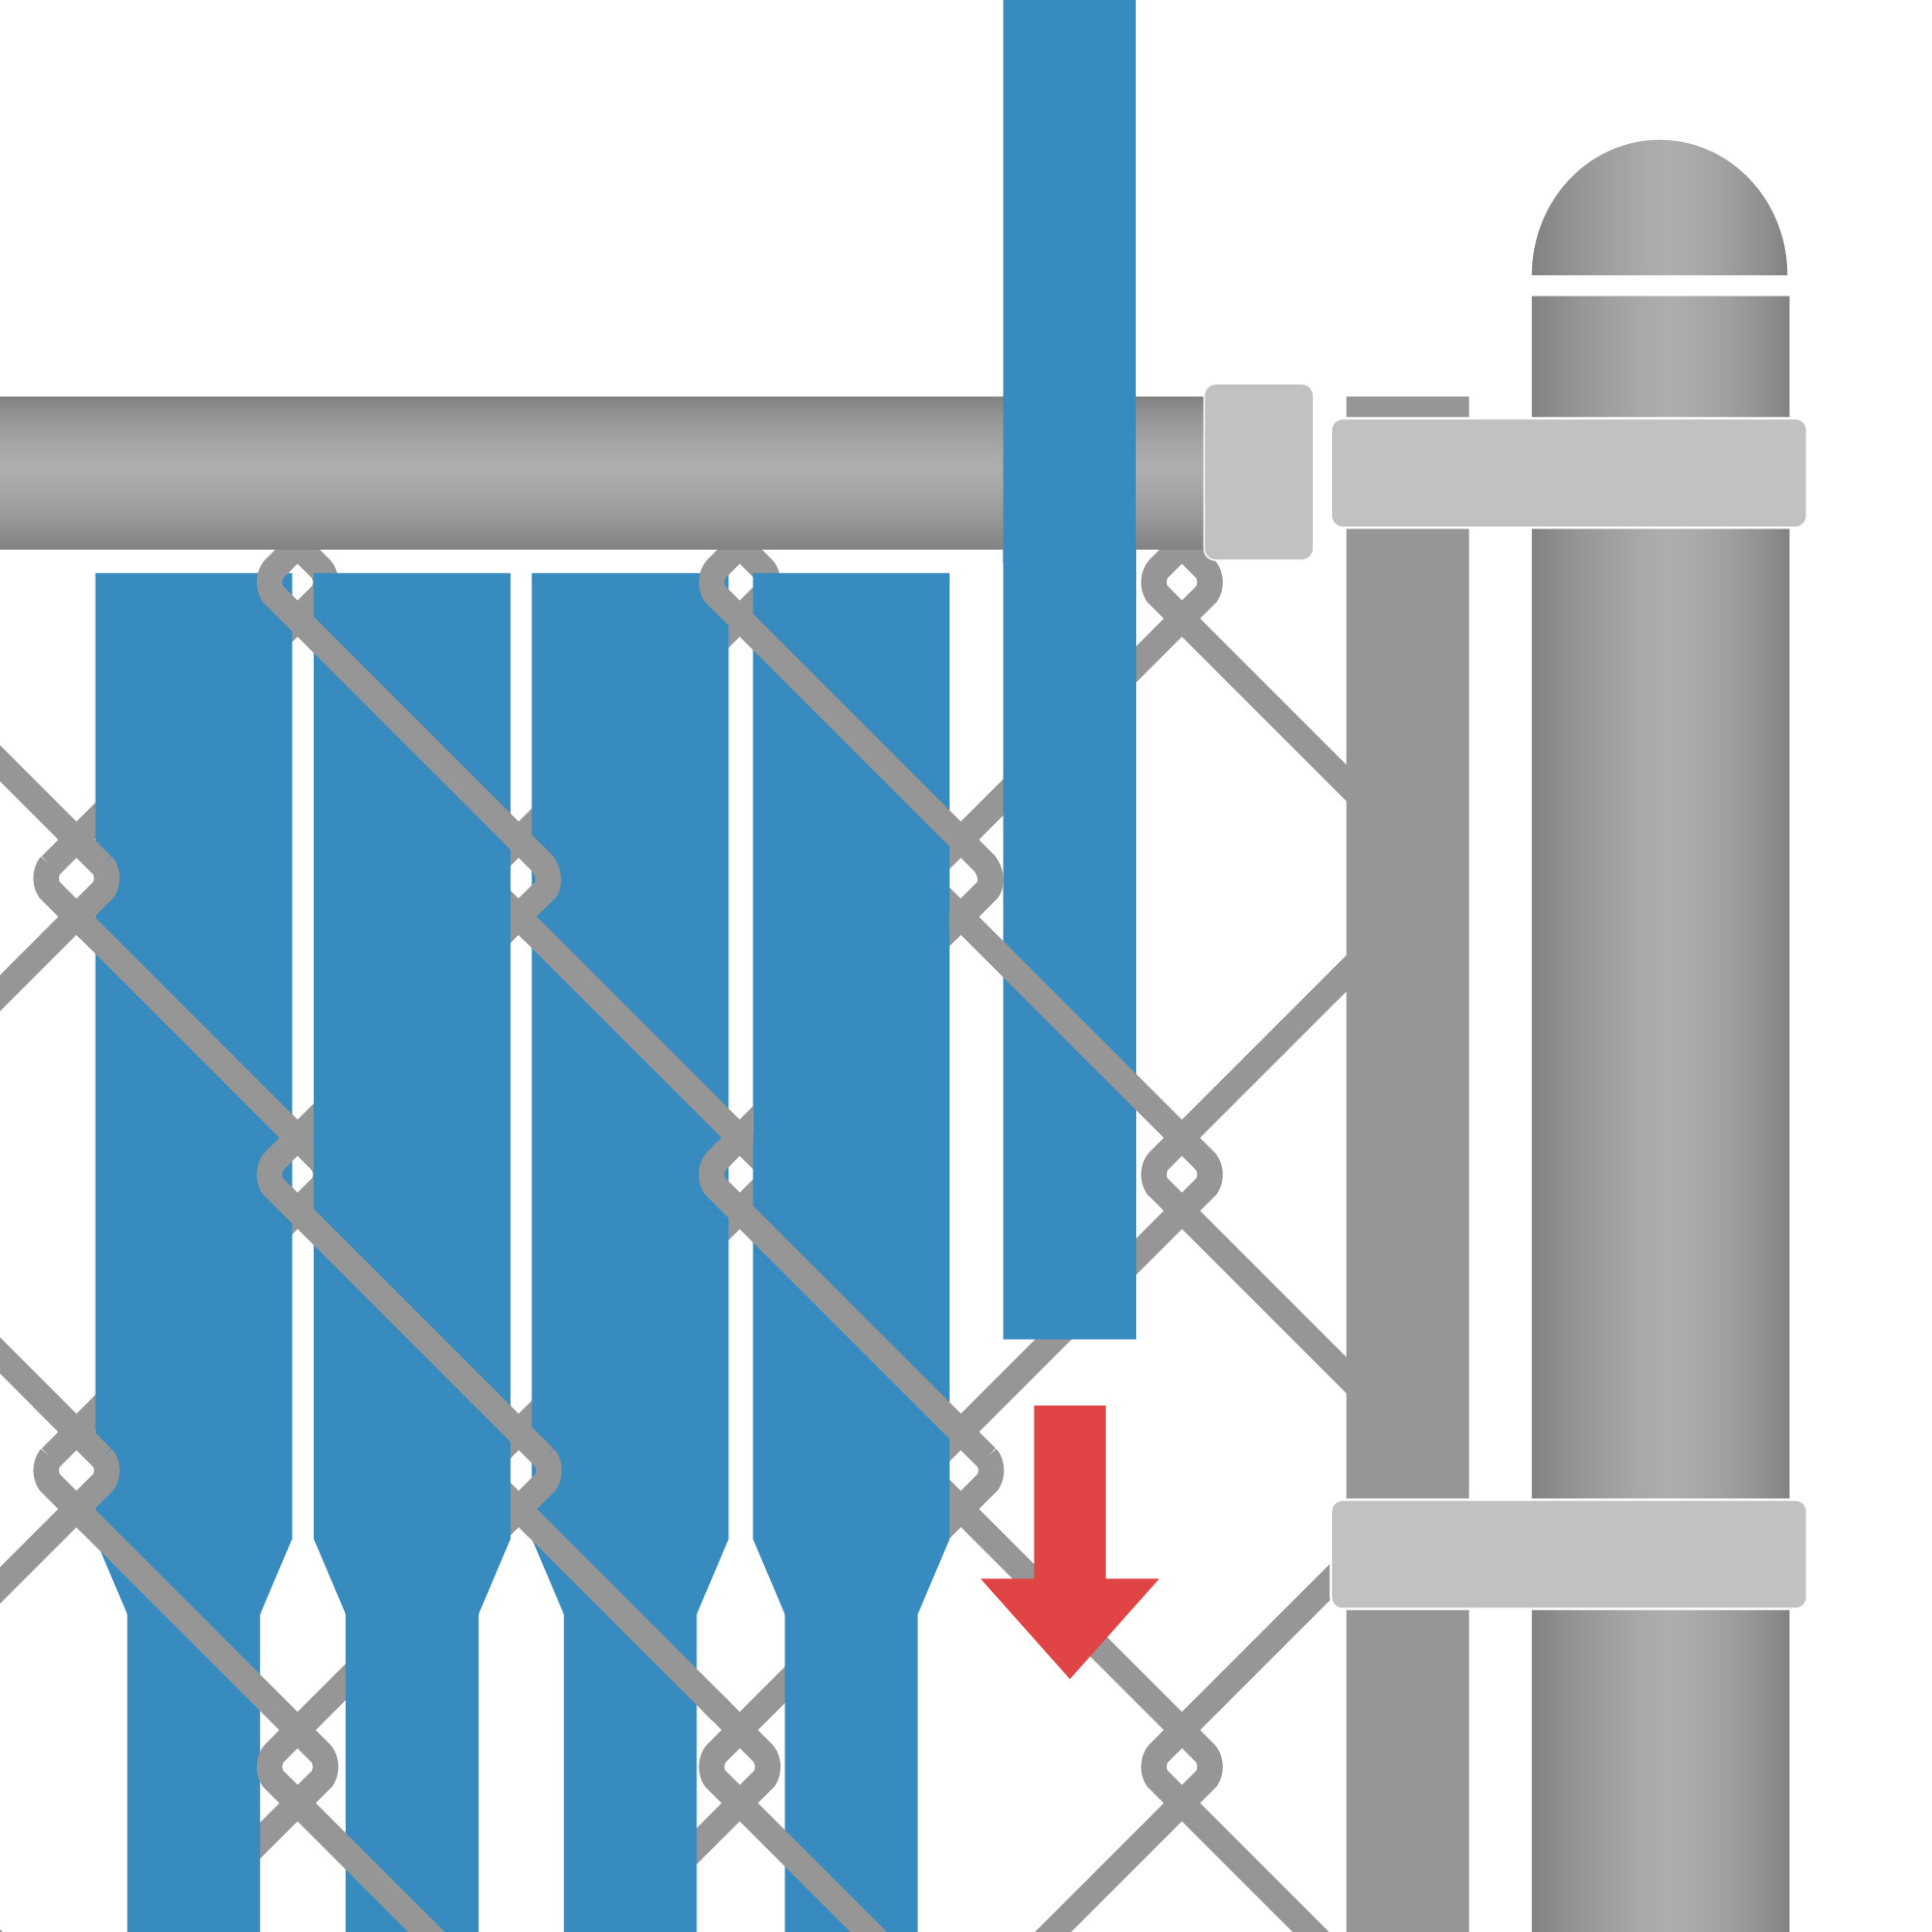
Insert the Slats:
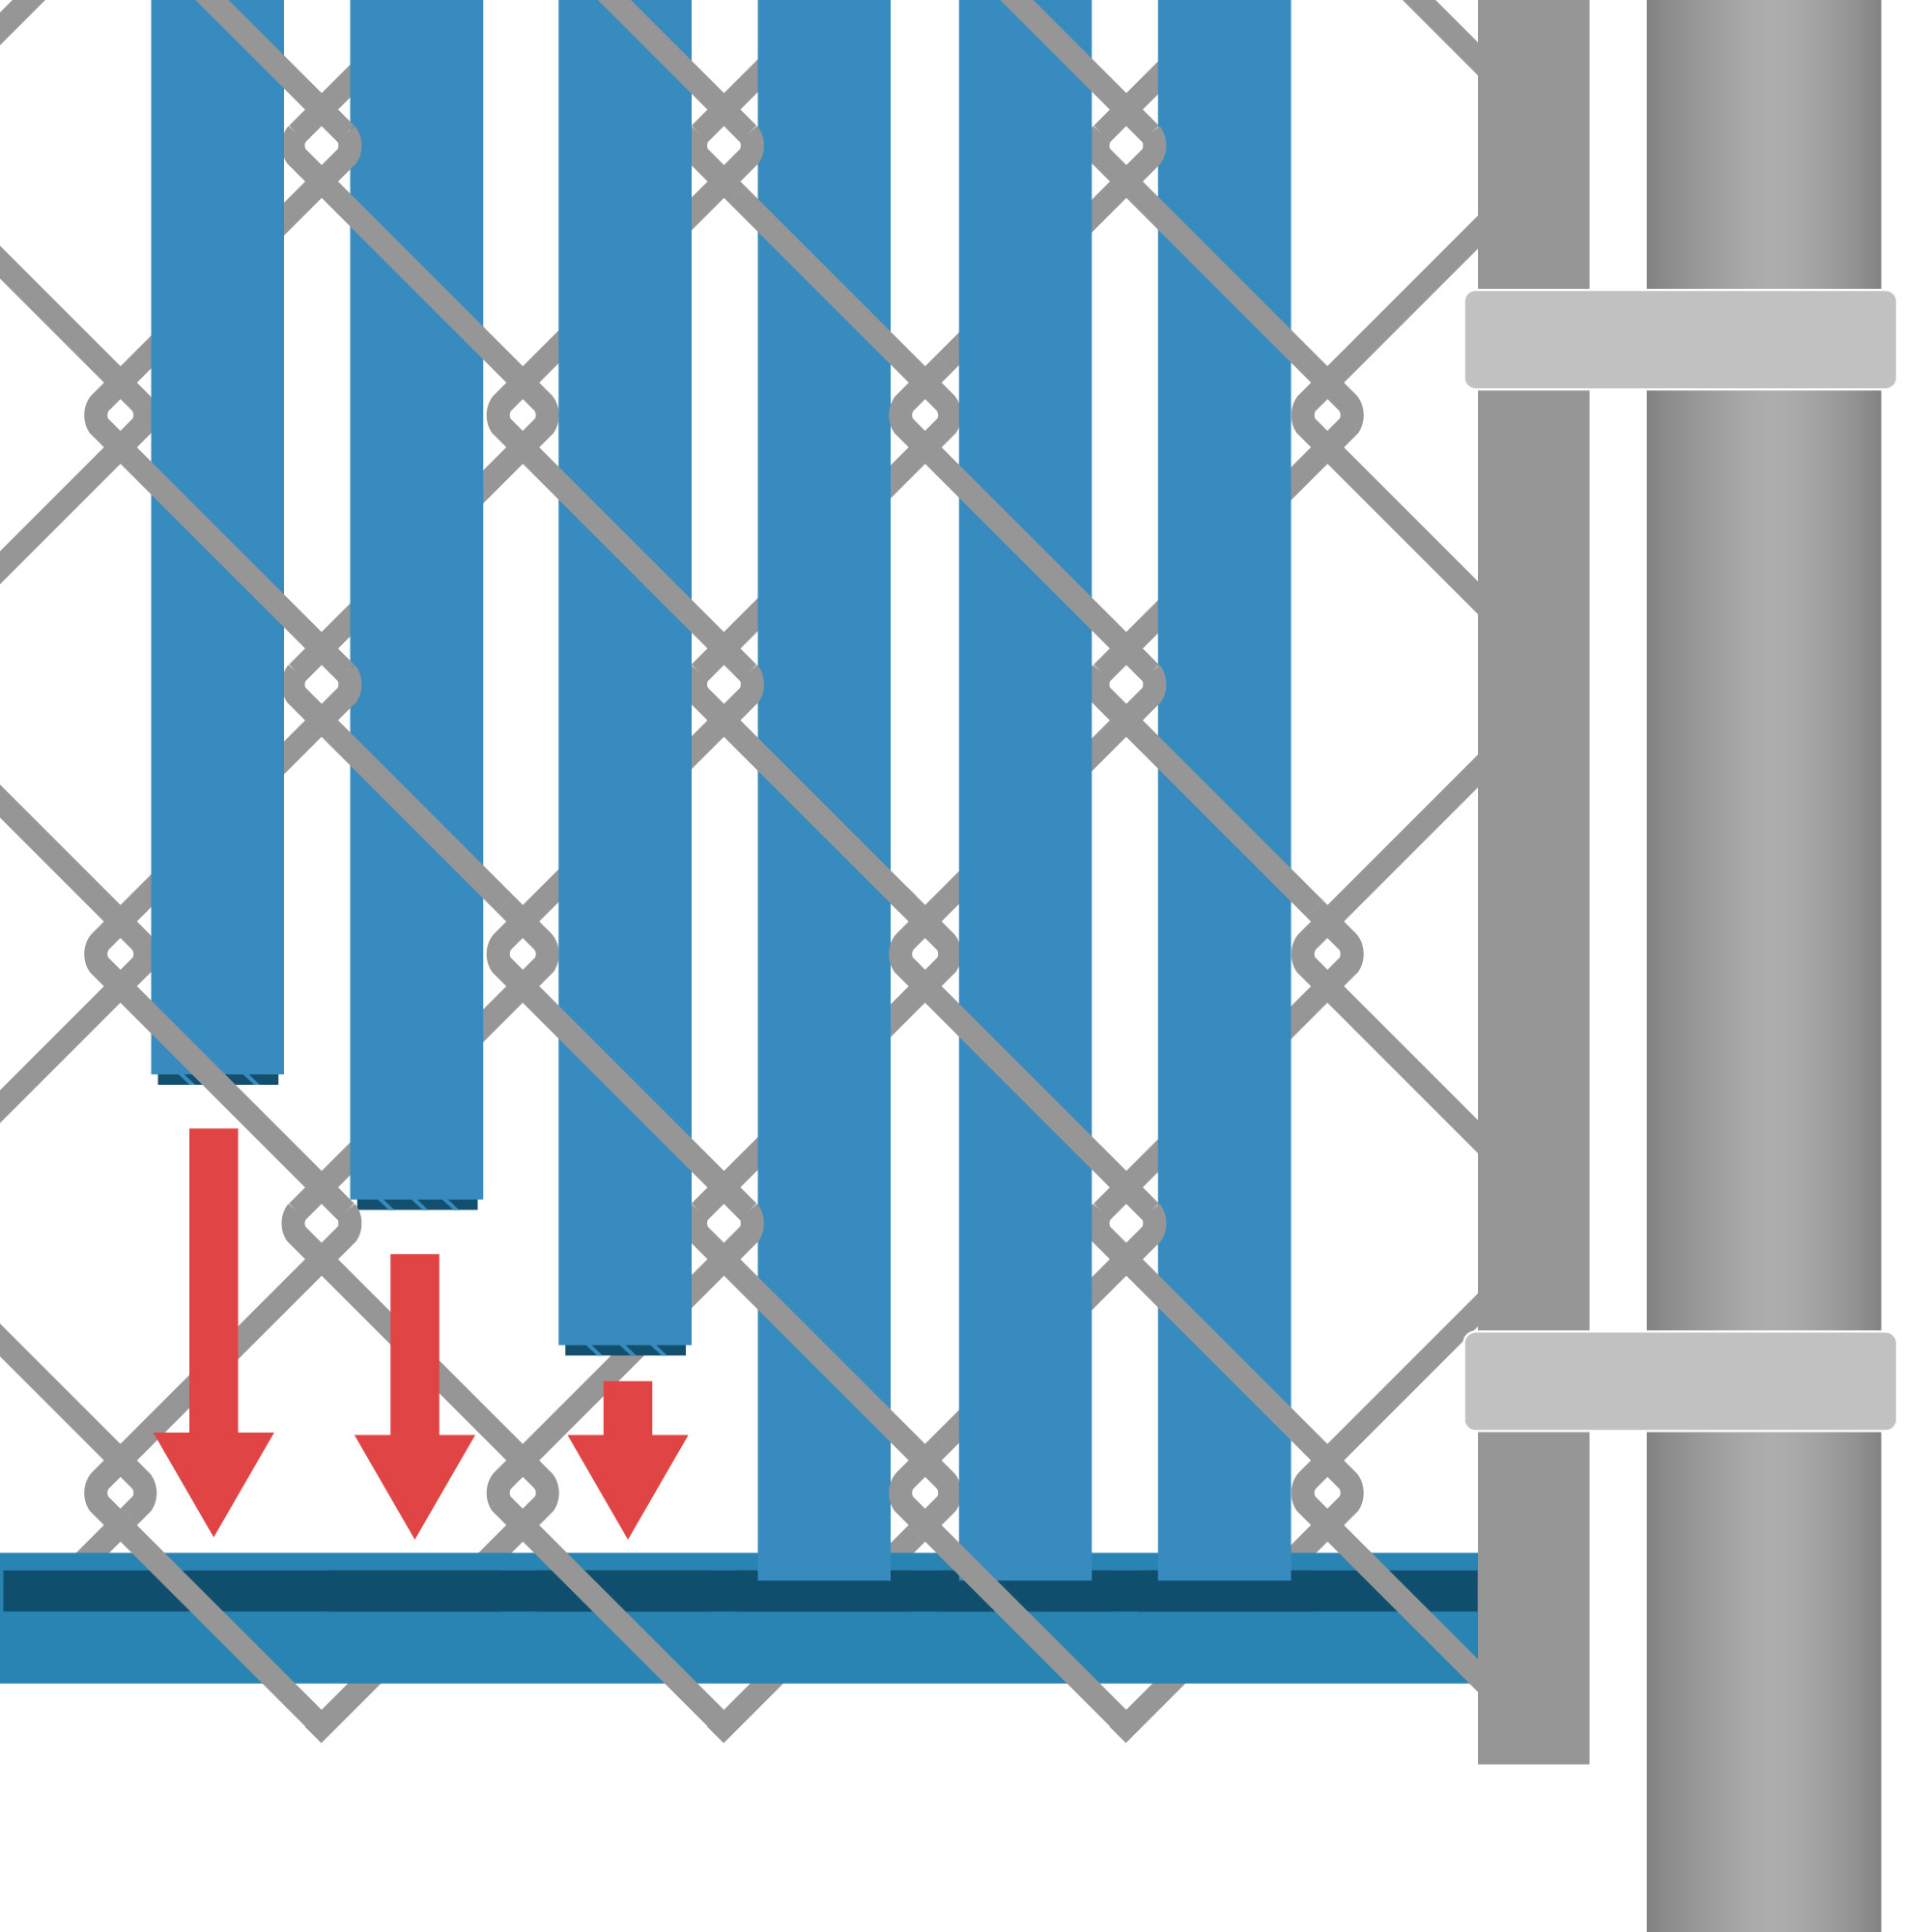
- Starting at one end of the fence, take a slat and insert its top end into the chain link mesh, guiding it downward toward the bottom locking channel.
- Continue sliding the slat down until its notched bottom end securely locks into the bottom channel.
- Repeat this process for each slat, ensuring they are evenly spaced and properly aligned.
Final Adjustments:
- Once all slats are installed, inspect the fence to ensure all slats are securely locked into the bottom channel and are uniformly positioned.
- Make any necessary adjustments to achieve a consistent appearance.
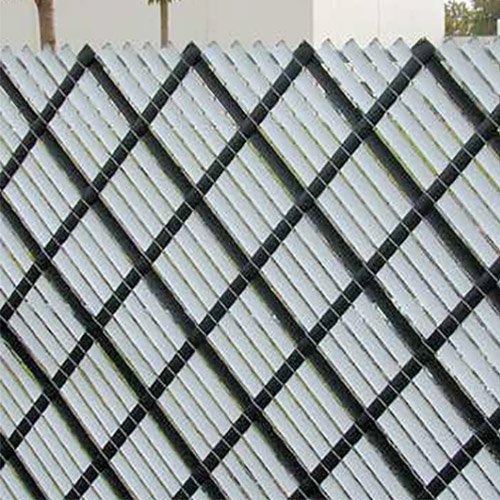
2. Industrial Chain Link Fence Privacy Slats
Tools and Materials Needed:
- Industrial privacy slats
- Locking devices or channels (if provided)
- Tape measure
- Protective gloves
Installation Steps:
Preparation:
- Measure your fence to determine the number of slats required.
- Lay out the slats and any locking devices along the fence line.
Insert the Slats:
- Hold a slat vertically and insert its top end into the chain link mesh.
- Slide the slat downward, ensuring it aligns with the mesh pattern.
- If the slats come with locking devices, follow the manufacturer's instructions to secure each slat in place.
Repeat the Process:
- Continue inserting slats along the length of the fence, ensuring consistent spacing and alignment.
Final Inspection:
- Check that all slats are securely installed and make any necessary adjustments for uniformity.

3. Winged Chain Link Fence Privacy Slats
Tools and Materials Needed:
- Winged privacy slats
- Tape measure
- Protective gloves
Installation Steps:
Preparation:
- Measure the fence to determine the quantity of slats needed.
- Lay out the slats along the fence for easy access.
Insert the Slats:
- Take a slat and position it vertically with the "wings" facing the chain link mesh.
- Insert the slat into the mesh, ensuring the wings engage and grip the wires securely.
Continue Installation:
- Repeat the process for each slat, maintaining even spacing and alignment.
Adjust and Secure:
- After all slats are installed, inspect the fence to ensure all wings are properly engaged and the slats are uniformly positioned.
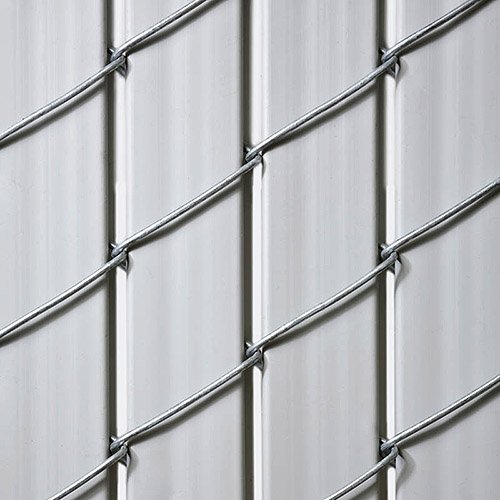
4. LiteLink Chain Link Fence Privacy Slats
Tools and Materials Needed:
- LiteLink privacy slats
- Tape measure
- Protective gloves
Installation Steps:
Preparation:
- Measure the fence length to calculate the number of slats required.
- Organize the slats along the fence line.
Insert the Slats:
- Hold a slat vertically and insert it into the chain link mesh, starting from the top.
- Slide the slat downward, ensuring it follows the mesh pattern and is securely in place.
Complete the Installation:
- Continue inserting slats along the entire fence, checking for consistent spacing and alignment.
Final Check:
- Inspect the fence to ensure all slats are properly installed and make adjustments as needed.
5. Top Lock Chain Link Fence Privacy Slats
Tools and Materials Needed:
- Top Lock privacy slats
- Top locking channel
- Tape measure
- Scissors or utility knife
- Protective gloves
Installation Steps:
Preparation:
- Measure the fence to determine the number of slats and the length of the top locking channel needed.
- Lay out the slats and the top locking channel along the fence line.
Insert the Slats:
- Starting at one end of the fence, insert a slat vertically into the chain link mesh, guiding it from top to bottom.
- Continue the process for the full length of the fence, making sure slats are aligned and properly seated.
Attach the Locking Channel:
- Once a section of slats is inserted, align the top locking channel with the row of slats.
- Press the channel down until it locks into the notches at the top of each slat.
- Ensure the channel is flush across the top and fully engaged on every slat.
Repeat and Inspect:
- Repeat the process across the remaining sections of the fence.
- Step back and inspect to ensure the slats are evenly spaced and secure.
6. FinLink Chain Link Fence Privacy Slats
Tools and Materials Needed:
- FinLink privacy slats (designed with a "fin" on each side for grip)
- Bottom locking channel (included with most FinLink kits)
- Tape measure
- Utility knife or heavy-duty scissors (optional)
- Protective gloves
Installation Steps:
Preparation:
- Count the number of fence sections and measure their height to calculate how many slats and locking channels are needed.
- Lay out the FinLink slats and channels nearby for convenient access.
Insert the Locking Channel:
- Place the bottom locking channel horizontally through the bottom of the fence fabric.
- It should weave through the lowest diamonds, aligning with the vertical slat rows.
Insert Slats:
- Starting at one end of the fence, take a slat and orient it so the “fins” are aligned horizontally (they will grip the wire as inserted).
- Slide the slat vertically from the top of the fence, threading it through the mesh so it slots into the bottom channel.
- The fins should "snap" or wedge between the diamonds, creating a tight, secure fit.
Continue the Process:
- Insert slats every 2" along the fence, matching the chain link pattern.
- As you move along the fence, ensure each slat is fully seated in the bottom channel and the fins are engaged.
Final Inspection:
- Step back and inspect the slats for straightness and uniformity.
- Ensure the bottom channel is holding slats snugly in place. Adjust if needed.
7. Feather Lock Chain Link Fence Privacy Slats
Tools and Materials Needed:
- Feather Lock slats (featuring flexible feathered fins on both sides)
- Bottom locking channel (included)
- Tape measure
- Gloves for handling sharp wire edges
Installation Steps:
Prepare Fence and Materials:
- Measure fence dimensions to ensure you have the correct number of slats and channels.
- Unpack the slats and organize them for easy reach during installation.
Insert the Locking Channel:
- Weave the included bottom locking channel horizontally through the base of the fence.
- Align it with the vertical chain link diamonds.
Insert the Slats:
- With the “feathers” of each slat facing outward, slide the slat vertically into the chain link fabric.
- Guide it all the way down so the bottom locks into the channel.
- The feathered sides will flex slightly, creating tension to hold the slat in place.
- You should feel mild resistance as the feathered sides engage the wire mesh, helping with security and privacy.
Repeat and Check:
- Continue placing slats side-by-side, every 2" across the fence.
- Step back and ensure all slats are straight, evenly spaced, and properly locked.
8. Forever Green Chain Link Fence Hedge Slats
Tools and Materials Needed:
- Forever Green hedge slats (artificial foliage with center spine)
- Optional zip ties (for extra security in windy areas)
- Tape measure
- Gloves
Installation Steps:
Plan Layout:
- Lay out hedge slats and measure your fence.
- Hedge slats are typically pre-assembled with artificial leaves around a plastic core.
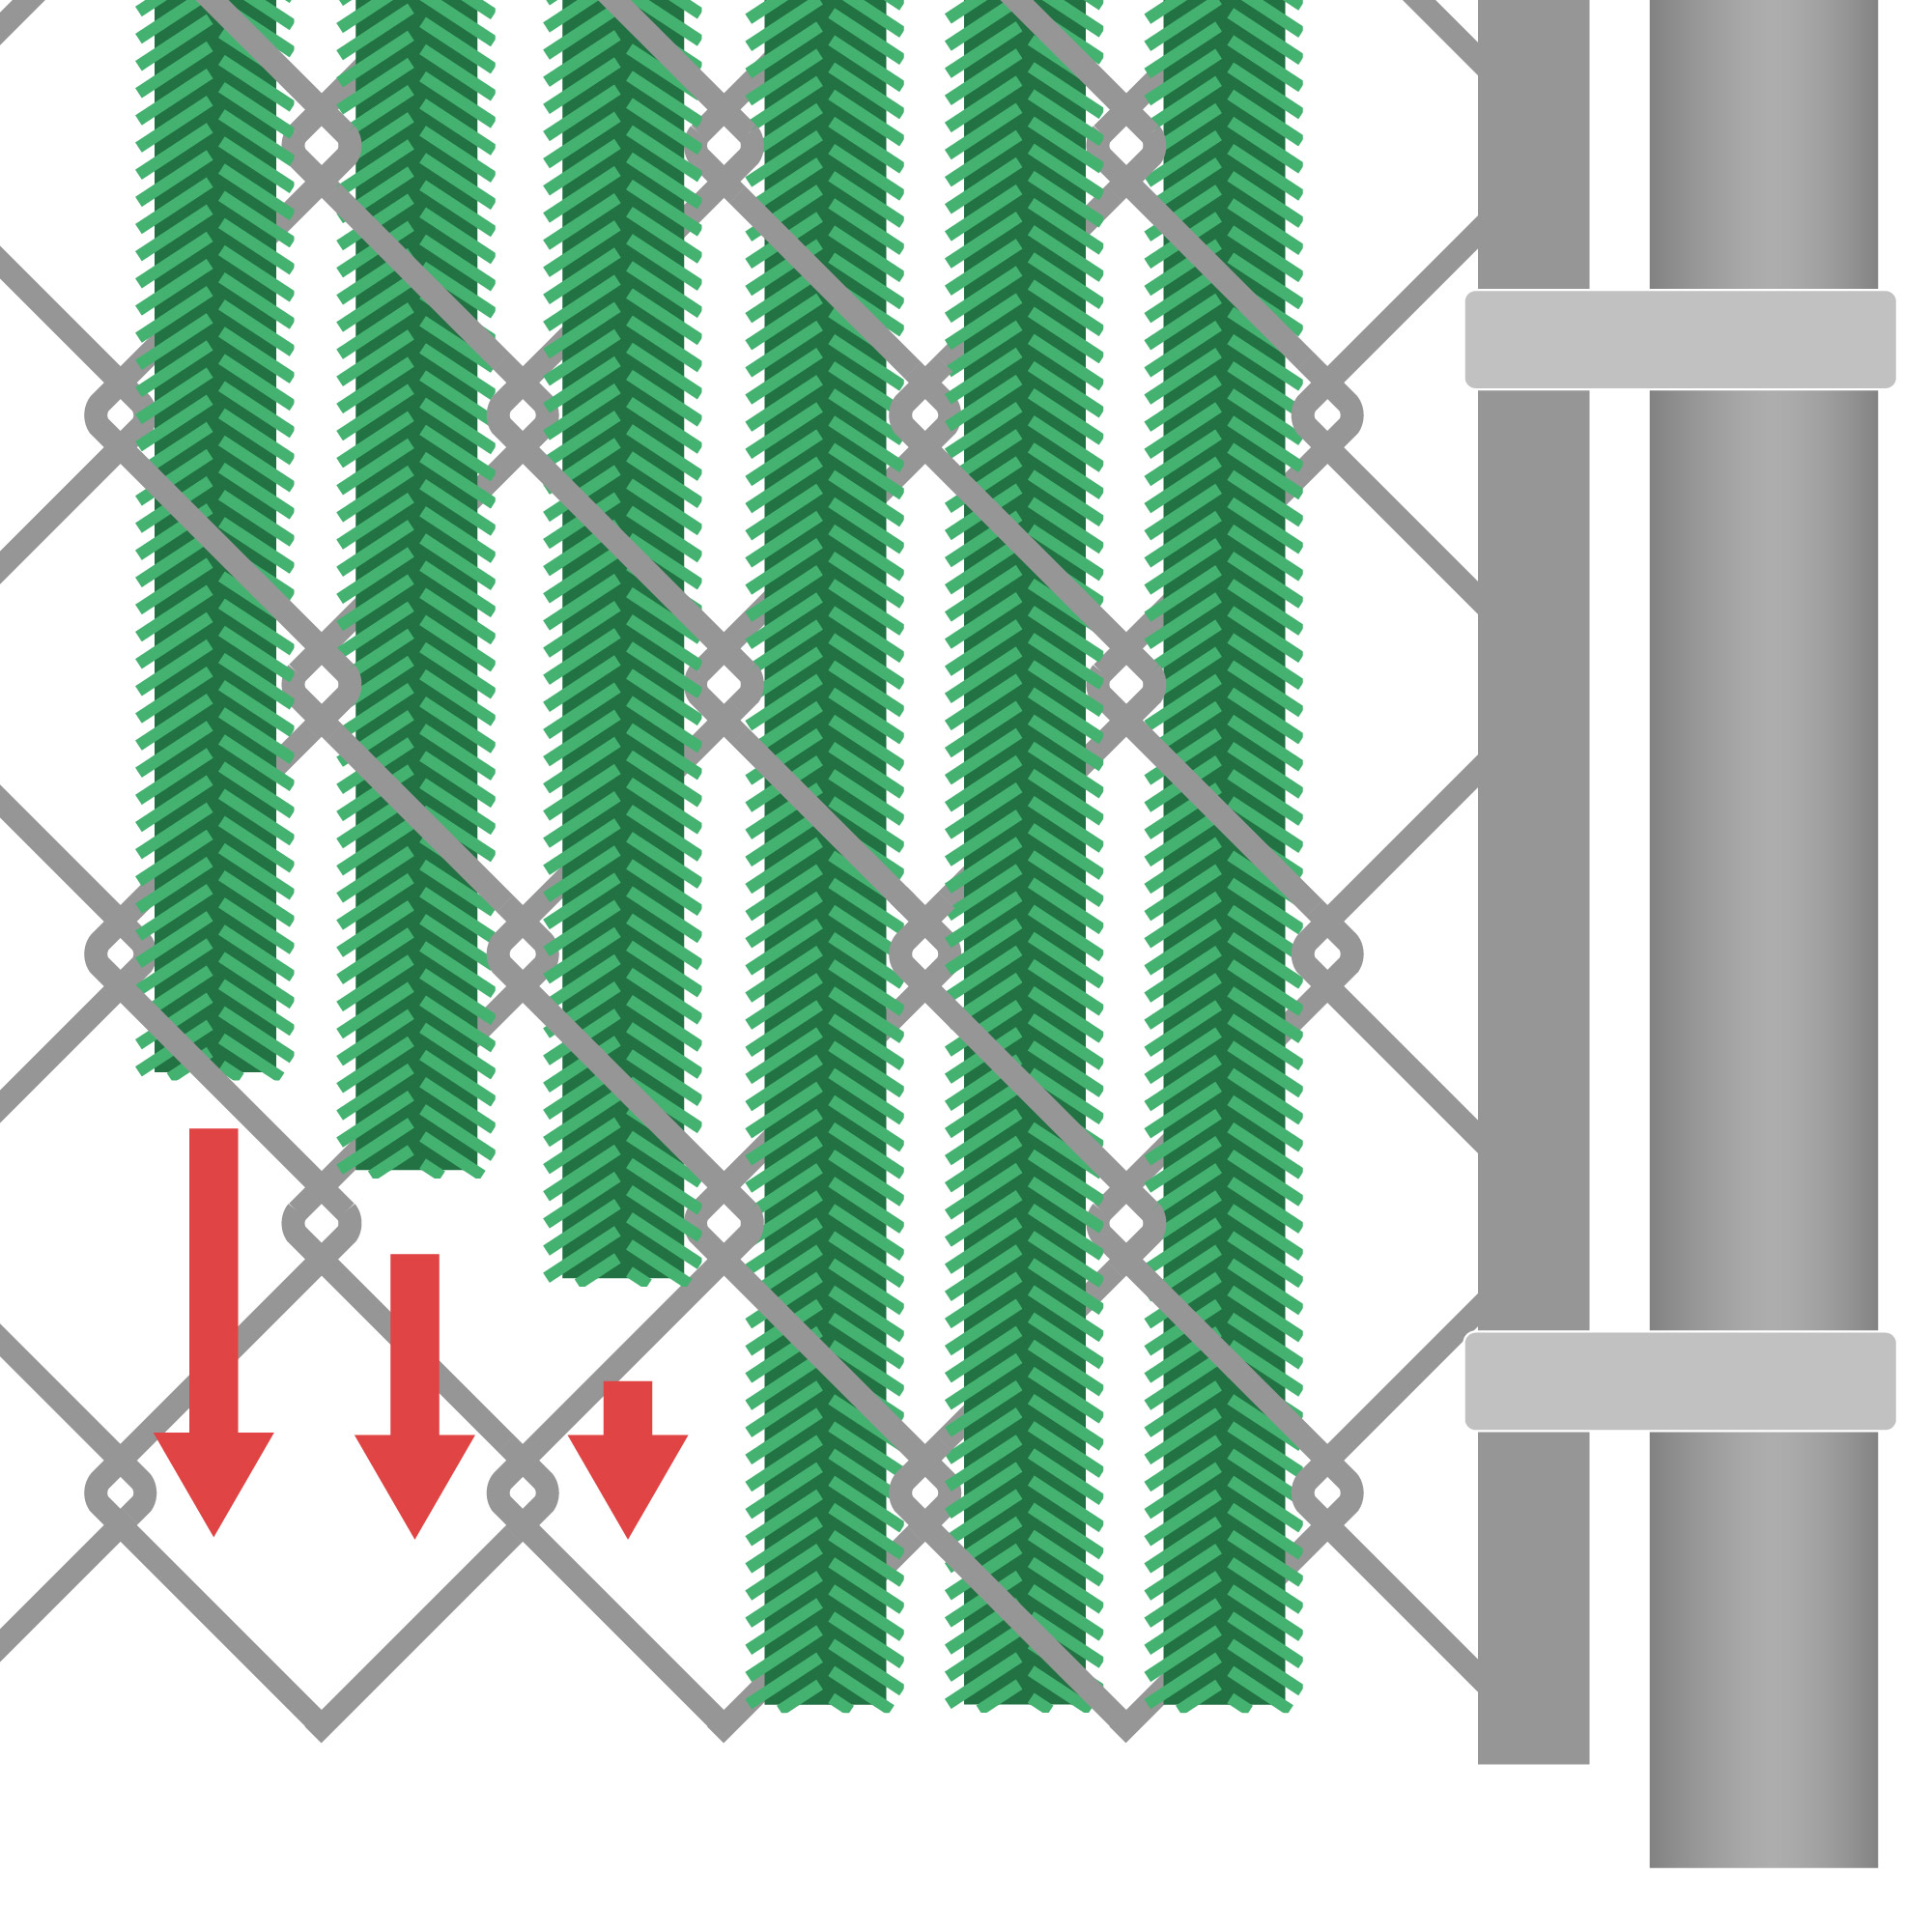
Insert the Hedge Slats:
- Insert each hedge slat vertically into the chain link mesh.
- Slide from the top down, weaving through the fence openings.
- Position each slat so the foliage faces outward for best visual coverage.
Space and Align:
- Space each hedge slat about 1 diamond width apart (2 inches).
- Adjust the foliage so it spreads evenly to block sightlines.
Optional Fastening:
- In areas with high wind or potential movement, secure the tops or middles of hedge slats with zip ties or fence clips.
- Use green or black ties to blend with the foliage.
Final Touches:
- Fluff and adjust the foliage by hand to ensure a full, natural look.
- Step back and check for gaps or sparse areas.
Contact Us
Are you in search of the ideal Privacy solution? Look no further than Privacy Slat King! We're excited to assist you in finding the perfect solution tailored to your unique privacy needs, whether for commercial or residential purposes. With our highly skilled and friendly team of experts, you can rest assured that you're in good hands. We are committed to guiding you every step of the way, ensuring you find a solution that meets both your practical and aesthetic requirements. Ready to enhance your privacy? Simply click the button below to get started and let us help you transform your space today! Looking for more info? Check out our Installation Videos!
Contact Us Installation Videos